Introduction: Maximizing Space in Small Living Areas
Living in a small space often means getting creative with storage solutions. One area that can quickly become cluttered is shoe storage. Whether you have a passion for footwear or just a practical collection, keeping your shoes organized and accessible is essential. In this guide, we’ll explore how to craft a DIY shoe rack specifically designed for small living spaces. With a few simple materials and a bit of creativity, you can create a custom shoe storage solution that maximizes space and enhances the functionality of your home.
Assessing Your Needs: Understanding Your Shoe Storage Requirements
Before diving into the DIY process, take some time to assess your shoe storage needs. Consider the number of shoes you own, the types of footwear you regularly wear, and the available space in your home. Are you looking to store just a few pairs of everyday shoes, or do you need storage for boots, heels, and sneakers? Understanding your requirements will help you design a shoe rack that meets your specific needs and fits seamlessly into your living space.
Choosing the Right Location: Finding the Perfect Spot for Your Shoe Rack
Once you’ve determined your shoe storage needs, the next step is to find the ideal location for your DIY shoe rack. Look for underutilized spaces in your home, such as the back of a closet door, an empty corner, or even unused wall space. By utilizing vertical space, you can maximize storage without taking up valuable floor space, making it easier to navigate and declutter your living area.
Gathering Materials: What You’ll Need for Your DIY Shoe Rack
Now that you’ve identified the perfect location for your shoe rack, it’s time to gather your materials. Fortunately, you won’t need anything too fancy for this DIY project. Basic materials such as wood planks, dowels, screws, and brackets are readily available at most hardware stores and are relatively inexpensive. Additionally, you may want to invest in a few tools such as a saw, drill, and measuring tape to help with the construction process.
Designing Your Shoe Rack: Customizing the Layout and Configuration
With your materials in hand, it’s time to start designing your DIY shoe rack. Consider the layout and configuration that will best suit your space and storage needs. Will you opt for a simple wall-mounted rack, a freestanding shelving unit, or a combination of both? Think about factors such as shoe size, accessibility, and aesthetics as you plan the layout of your shoe rack.
Building Your Shoe Rack: Step-by-Step Construction Guide
Now comes the fun part: building your DIY shoe rack! Start by measuring and cutting your wood planks to the desired dimensions, keeping in mind the overall size and layout of your rack. Next, assemble the frame using screws and brackets, ensuring it’s sturdy and secure. If you’re incorporating dowels for shoe storage, drill holes at regular intervals along the shelves to accommodate them. Finally, sand down any rough edges and apply a coat of paint or stain to finish off your shoe rack with a polished look.
Installing Your Shoe Rack: Mounting and Securing Your Creation
Once your shoe rack is constructed, it’s time to install it in your chosen location. If you’ve opted for a wall-mounted design, use anchors and screws to securely attach it to the wall, making sure it’s level and stable. For freestanding units, place rubber pads or felt feet on the bottom to protect your floors and prevent slipping. Take your time during the installation process to ensure that your shoe rack is safely and securely in place.
Organizing Your Shoes: Maximizing Efficiency and Accessibility
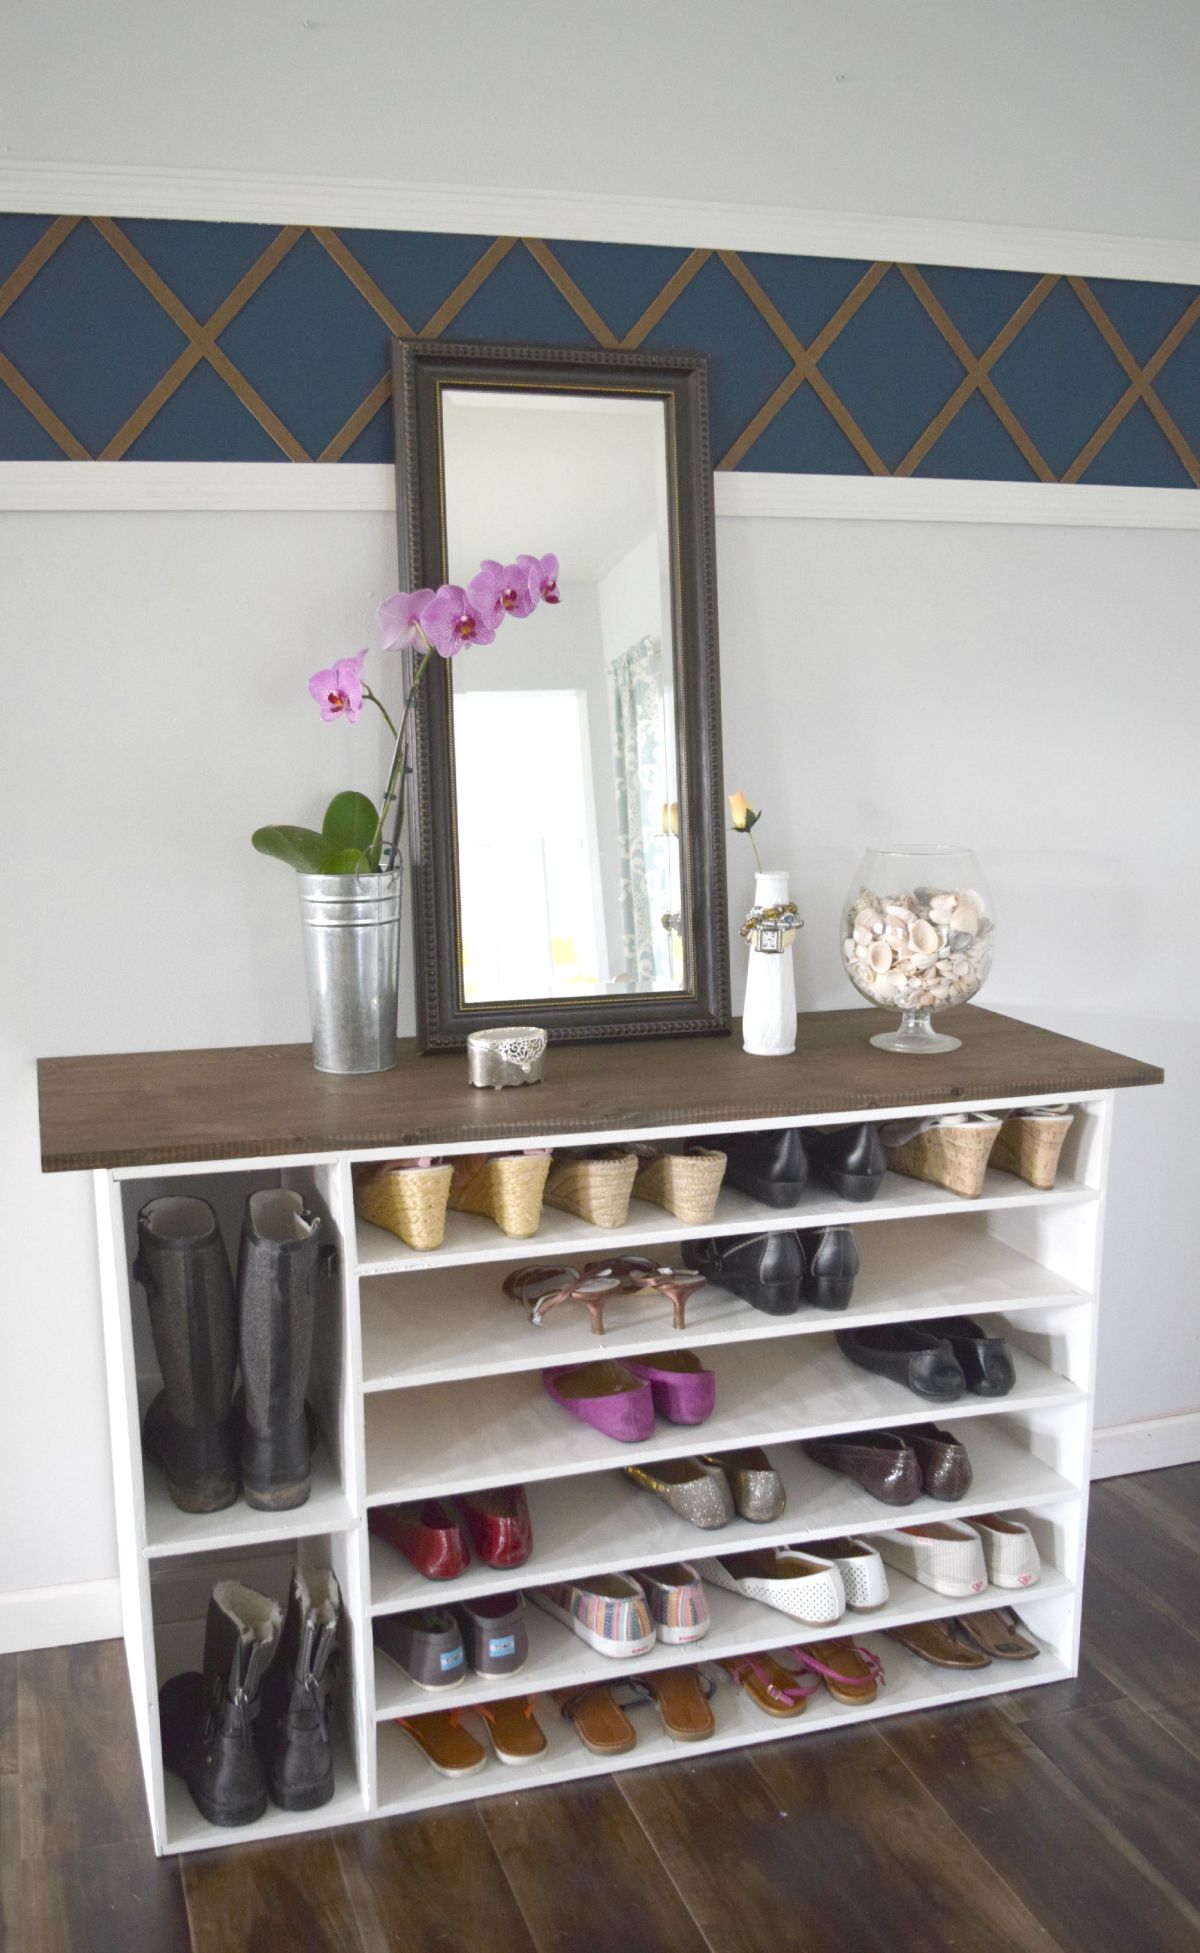
With your DIY shoe rack installed, it’s time to organize your footwear collection. Consider arranging your shoes by type, season, or frequency of use to maximize efficiency and accessibility. Utilize bins, baskets, or labels to keep smaller items such as sandals, slippers, or shoe accessories organized and easily accessible. By establishing a system that works for you, you’ll ensure that your shoes are always at your fingertips when you need them.
Maintaining Your Shoe Rack: Tips for Long-Term Durability
To ensure the longevity of your DIY shoe rack, it’s essential to keep it well-maintained. Regularly inspect the rack for any signs of wear or damage, such as loose screws or wobbly shelves, and make repairs as needed. Additionally, periodically clean and dust the rack to remove dirt, debris, and moisture that can accumulate over time. By taking proactive measures to maintain your shoe rack, you’ll prolong its lifespan and continue to enjoy its space-saving benefits for years to come.
Personalizing Your Shoe Rack: Adding Custom Features
Now that your shoe rack is taking shape, consider adding some custom features to personalize it further. Depending on your preferences and needs, there are several options to enhance the functionality and aesthetic appeal of your DIY creation.
1. Shoe Rack Dividers: If you want to keep your shoes neatly organized and prevent them from getting mixed up, consider adding dividers between the shelves. You can use thin strips of wood or even repurpose old cardboard to create dividers that separate each pair of shoes, making it easier to find the right pair quickly.
2. Decorative Backing: Give your shoe rack a touch of personality by adding a decorative backing. Whether you opt for a bold patterned wallpaper, a coat of colorful paint, or a simple geometric design, a decorative backing can transform your shoe rack into a stylish focal point in your home.
3. Built-In Bench: If space allows, consider incorporating a built-in bench into your shoe rack design. Not only does a bench provide a convenient spot to sit while putting on or taking off your shoes, but it also offers additional storage space underneath for bulky items such as boots or seasonal footwear.
Conclusion: Enjoying the Benefits of Your DIY Shoe Rack
In conclusion, crafting a DIY shoe rack for small living spaces is a practical and rewarding endeavor that can help you maximize space, stay organized, and enhance the functionality of your home. By assessing your storage needs, choosing the right location, gathering materials, designing a custom layout, and following a step-by-step construction process, you can create a shoe rack that perfectly fits your space and lifestyle. With a bit of creativity and effort, you’ll enjoy the benefits of a clutter-free living area and easy access to your favorite footwear for years to come.