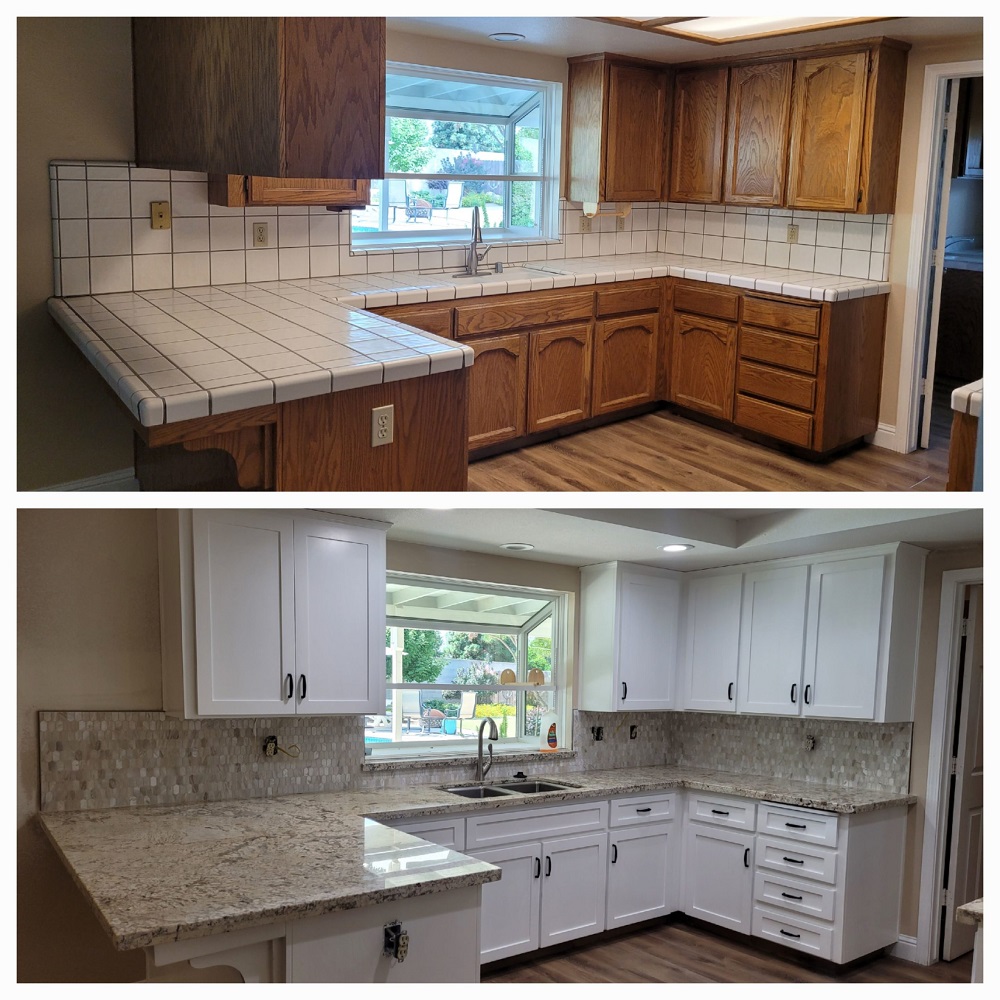
Refacing cabinets can dramatically transform the look and feel of a space without the expense and hassle of a full remodel. By updating your cabinetry, you enhance the functionality and aesthetics of your kitchen or bathroom, making it more welcoming and efficient. This article will guide you through the process step-by-step, ensuring you achieve professional-looking results.
Understanding Cabinet Refacing: What to Know
What is Cabinet Refacing?
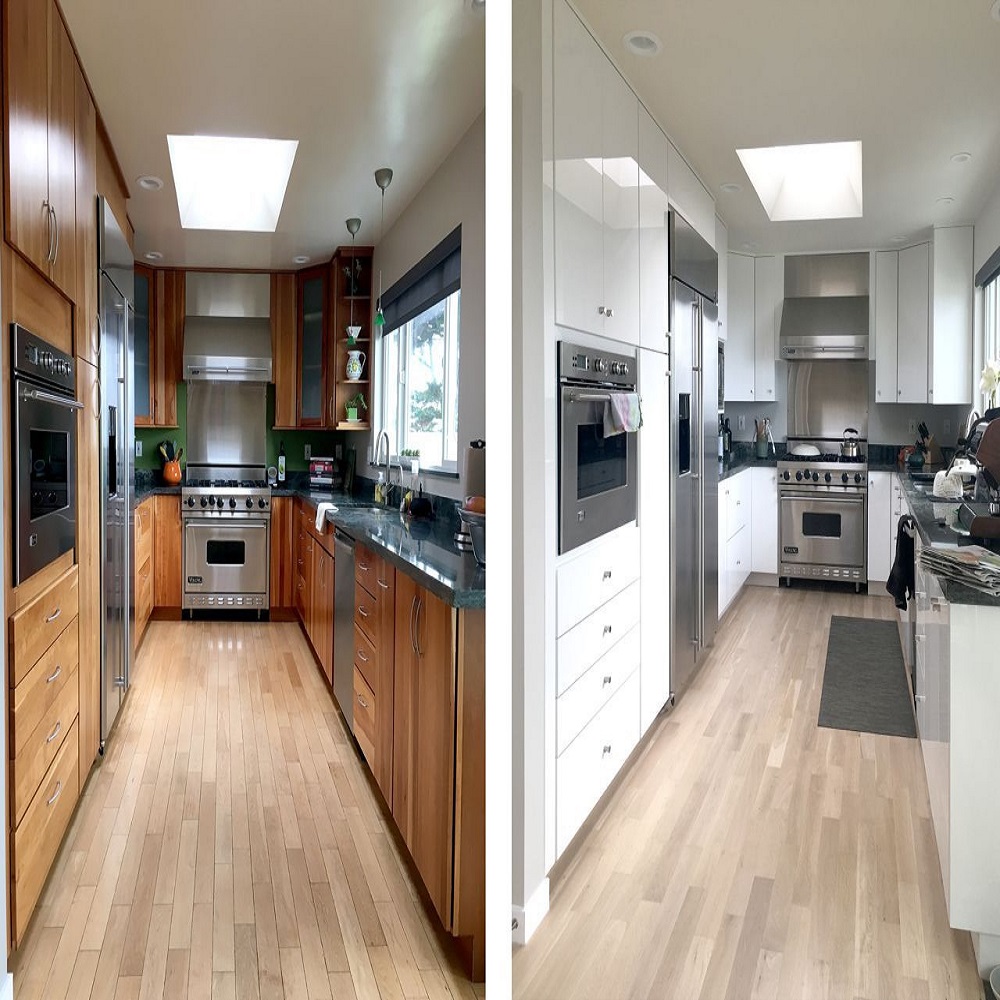
Cabinet refacing means replacing cabinet doors, drawers, and hardware while keeping the existing cabinet structure intact. This is a perfect solution for those who are happy with their kitchen layout but want to update its look. The key advantage is that it allows you to achieve a fresh, modern appearance without the cost and mess of demolishing and rebuilding your cabinetry.
Advantages of Refacing Cabinets
Refacing cabinets comes with multiple benefits. First, it’s more affordable than a complete remodel or buying new cabinets. For many homeowners, this means they can achieve a high-end look on a budget. Second, refacing is less time-consuming—often taking just a few days. Third, it minimizes waste since you are not throwing away your existing cabinet boxes, which is better for the environment. Lastly, refacing allows you to customize your space with a variety of styles, finishes, and hardware options.
Preparing for Your Project
Assessing Your Cabinets
Before diving into the refacing process, take the time to assess the condition of your cabinets. Check for any signs of damage, rot, or structural issues. If your cabinets are built well but just look dated, refacing is a viable option. However, if they’re in poor shape, you may need to consider replacements. Look closely at the hardware, hinges, and drawer slides; these will also need to be replaced or updated for a seamless look.
Gathering Your Tools and Materials
Having the right tools and materials is essential for a successful cabinetry refacing project. You’ll need a few basic tools: a measuring tape, a screwdriver set, a level, a circular saw, and possibly a jigsaw. For the materials, you’ll need the new cabinet doors and drawer fronts, veneer sheets (if you opt to cover the cabinet frames), new hardware, wood glue, and adhesive. Make sure to choose high-quality materials that will withstand daily use and enhance the appearance of your space.
Designing Your New Look
Choosing Cabinet Styles and Colors
One of the most exciting aspects of refacing is designing your new look. Depending on your space and personal style, you can opt for traditional, modern, or even eclectic designs. Consider whether you prefer painted or stained finishes. Painted cabinets can create a sleek, contemporary feel, while stained wood can add warmth and character. Look at color trends, but also think about what will complement your home’s existing decor. Don’t hesitate to experiment with different shades and textures to find what resonates with you.
Deciding on Hardware
Cabinet hardware is the finishing touch that can elevate your refaced cabinets to the next level. Choose knobs and pulls that align with the style you’re aiming for. For a modern look, consider sleek, minimalist designs, while more ornate styles can add a vintage touch. Don’t forget to match the finish of your hardware to other elements in the room, like faucet finishes or light fixtures, for a cohesive look.
Step-by-Step Refacing Process
Removing Existing Cabinet Doors and Drawers
Before you start refacing, you’ll need to remove the existing cabinet doors and drawers. Using a screwdriver, carefully undo the hinges and set the doors aside in a safe space. Label each door and drawer to make the reinstallation process easier. Pay close attention to any reports of hardware issues; if the hinges are worn or the drawer slides have issues, now is the time to replace them.
Cleaning and Preparing Cabinet Frames
Once everything is removed, thoroughly clean the cabinet frames with a gentle cleanser and a soft cloth. This ensures that no grease or grime interferes with the adhesive when applying new veneer or paint. Inspect the frames for any damage that may need repair. Small holes or cracks can be filled with wood filler, sanded smooth, and painted over, providing a fresh, clean base for your project.
Applying Veneer to Cabinet Frames
Measuring and Cutting the Veneer
If you’ve chosen to apply veneer to your cabinet frames, the next step is to measure and cut the veneer sheets accurately. Use a sharp utility knife or a circular saw for precise cuts. Ensure your cuts account for any curves or edges of your existing cabinet boxes. It’s advisable to have a backup supply of veneer if a mistake occurs, as this can save time and prevent project delays.
Applying the Veneer
When applying veneer, start at one end of the frame and work towards the opposite side. Use wood glue or a specialized adhesive, pressing it onto the frame firmly. Use a roller or a clean cloth to ensure there are no air bubbles trapped under the veneer sheet. Once applied, trim any excess veneer edges and sand the corners for a polished finish. Allow adequate time for the adhesive to cure before proceeding with reattaching cabinet doors.
Installing New Doors and Drawers
Attaching New Doors
After the veneer has set, it’s time to install the new cabinet doors. Begin by aligning the hinges precisely; a level can help ensure they are installed straight. Pre-drill holes if necessary to avoid splitting the wood. Attach the hinges and check the alignment of each door. Ensure they open and close smoothly before making any adjustments.
Installing Drawers and Hardware
Once your doors are secure, move on to the drawers. Ensure that any new slides fit properly and that the drawers open smoothly. Attach the drawer fronts if they are separate from the bodies. Finally, install the new hardware. Use a measuring tape to ensure each knob and pull is placed at the same height for a uniform look throughout the kitchen or bathroom.
Final Touches and Clean-Up
Inspecting Your Work
With all the doors, drawers, and hardware installed, take a step back and inspect your work. Check for any inconsistencies in alignment or finish and make any necessary adjustments. Close each cabinet and drawer to ensure their functionality and aesthetics meet your expectations. If you find any imperfections, don’t hesitate to rectify them before moving on.
Cleaning Up Your Workspace
After you’re satisfied with your cabinetry, it’s vital to clean up your workspace. Dispose of any debris, unused materials, or old hardware responsibly. Wipe down surfaces to remove dust or adhesive residue. A clean workspace not only looks better but also enhances the livability of your updated space.
Enjoying Your Transformative Project
Revel in Your Return on Investment
Congratulations! You have successfully refaced your cabinets, transforming your space into something that reflects your style and meets your needs. Take a moment to relish the results of your hard work. A well-executed refacing project can significantly increase the value of your home, offering a substantial return on investment should you decide to sell.
The Long-term Benefits of Refacing
In addition to the immediate aesthetic improvements, refacing cabinets prolongs their lifespan, making your kitchen or bathroom more functional for years to come. Moreover, the customization options you’ve chosen mean that your space will truly feel like your own. Regular maintenance and care will keep your refaced cabinets looking fresh and vibrant long after the project is completed.
Conclusion: Refacing for a Beautiful Home
Embrace the DIY Spirit
Refacing cabinets is an excellent way to refresh your home without breaking the bank. With careful planning, the right materials, and a little elbow grease, you can achieve professional results and transform your space. Always remember that this project is not just about the physical act of refacing—it’s about embracing the DIY spirit and making your home a reflection of who you are.
Inspire Others
Now that you have the knowledge and skills to refinish cabinets like a pro, consider sharing your experience! Inspire others in your community and encourage them to take on their home improvement projects. Your transformation could encourage someone else to take the leap and enhance their own space. Happy refacing!

