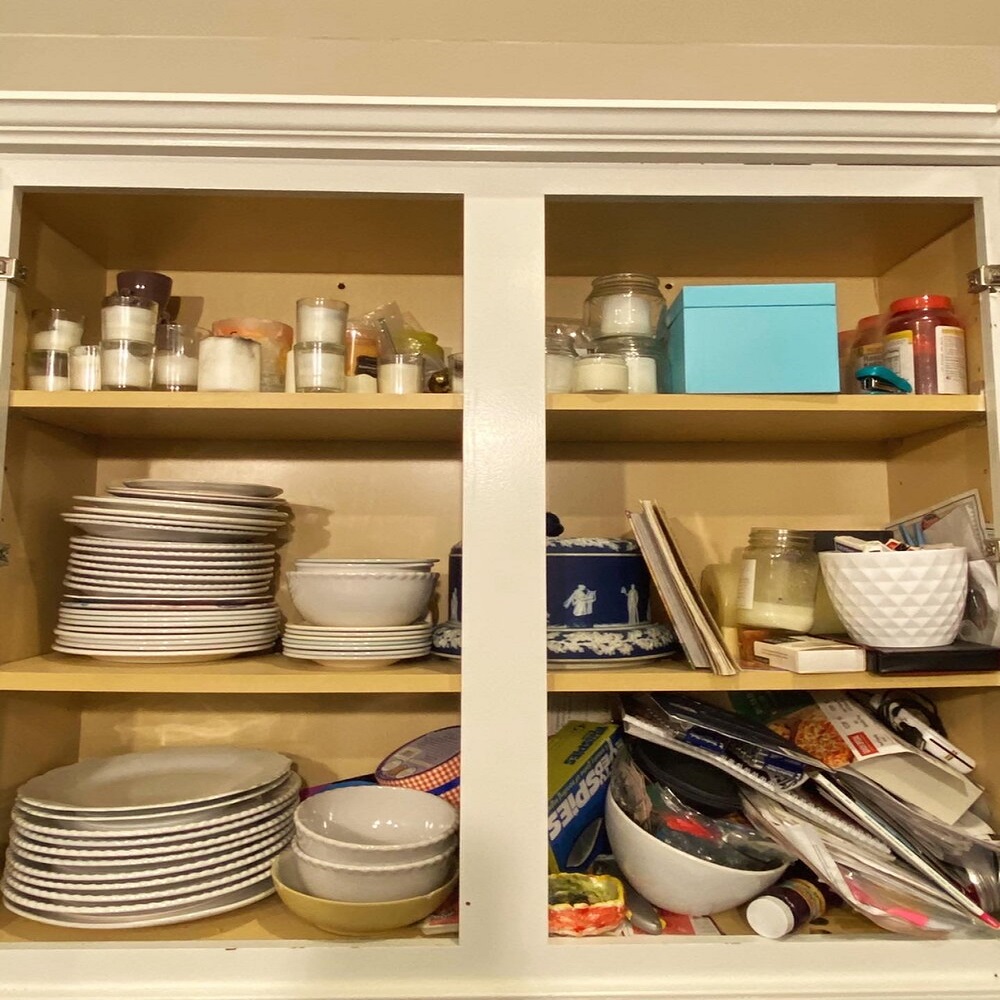
Step 1: Declutter Cabinets and Drawers
The first of the 7 steps for organizing kitchen cabinets is to declutter. Start by removing all items from your cabinets and drawers. It’s time for a fresh start! Be sure to thoroughly clean each area as you go. This will give you a clear view of your space and what you have. Next, check each item for its condition and how often you use it. Say goodbye to anything that’s broken or rarely used. Consider donating items that are in good shape but not essential to your daily cooking. This will make room for organizing the items you truly need. Keep only what you use regularly and what brings joy to your kitchen space. By reducing clutter, you set the stage for a more efficient and enjoyable cooking experience. Stay tuned for the next step where we will classify items to keep your kitchen neat and accessible.
Step 2: Group Items into Categories
After you declutter, the next step is to organize. Begin by categorizing your kitchen items. Think about how you use each and group them accordingly. Create categories that make sense for you. For example, put baking equipment in one group and everyday dishes in another. Doing this simplifies finding what you need later on.
Here’s a guide to common categories:
- Cookware: Pots, pans, and lids.
- Utensils: Spoons, spatulas, and whisks.
- Dinnerware: Plates, bowls, and cups.
- Food Storage: Containers and their matching lids.
- Small Appliances: Blenders, toasters, and mixers.
- Dry Goods: Pasta, rice, and spices.
- Baking Supplies: Measuring cups and baking sheets.
Categorizing helps you see how much you have and what you use. It makes it easier to organize each category in the space they need. Remember, the system you create should work for you. If you have a lot of one item, give it a category of its own. Tailor the categories to fit your cooking style and kitchen size.
Now that you have your categories, you’re ready for the next steps. These include finding the right spots for your items and optimizing your space. Stay with us as we continue to simplify your kitchen organization!
Step 3: Inventory and Assess Kitchen Space
To tailor your kitchen to your cooking habits, assessing your storage is key. Start by making an inventory of all kitchen cabinets and drawers. Measure the height, width, and depth. Write down the layout, noting any unusual spaces. This will give you a precise idea of where everything can go. Consider the best use for each space. Near the stove, you should keep cooking tools and spices. Less-used items can go higher up or in harder-to-reach areas. Think about adding extra shelves or racks if you’re short on space. Inspect for any wasted areas like corners and figure out how to use them. Look for spots where you can add hooks or stick-on holders. The goal is to know your space like the back of your hand. Once you do, organizing becomes much simpler. And you’ll be one step closer to a kitchen that works for you.
Step 4: Designate Zones for Efficiency
Creating zones in your kitchen is like mapping out a small city for your cooking tools and ingredients. Begin by designating specific areas for each category you identified earlier. For example, keep all baking items together and station them near the oven. Designate another zone for your cooking utensils, right next to the stove for easy reach while you cook.
Daily Use Zone
Place items you use every day in the most accessible spots. Keep plates, bowls, and cutlery near the dishwasher to make unloading a breeze. Store daily spices and oils close to your cooking area for quick seasoning.
Food Preparation Zone
Reserve a counter space for chopping, mixing, and preparing food. Keep cutting boards, knives, and mixing bowls here. This zone helps streamline your prep process.
Cooking Zone
This is the heart of your kitchen. You’ll want pots, pans, spatulas, and other tools within arm’s reach of your cooktop. Organizing this area saves time and makes cooking more intuitive.
Baking Zone
For those who love to bake, a baking zone is essential. Stock it with measuring spoons, mixing bowls, and baking sheets. A cabinet near the oven is perfect for this zone.
Cleaning Zone
Create a space for cleaning supplies under the sink. Store dish soap, scrubbers, and trash bags here for easy cleanup after meal prep.
By zoning your kitchen, each item has a set place, which reduces searching time and keeps your workflow smooth. Stick to these zones and you’ll notice how much faster and more enjoyable your cooking can be.
Step 5: Optimize with Vertical Storage Solutions
Tackling the issue of limited space? Consider vertical storage. It’s a game-changer. These solutions allow you to make the most out of the often-underutilized vertical space in your cabinets and drawers. Here’s how to elevate your kitchen organization literally:
- Install Hooks or Racks: Use cabinet doors or walls. Hang tools like measuring spoons, or even pots and pans. It’s a simple way to clear drawer space.
- Add Shelf Risers: These handy organizers can double your shelf space. Great for stacking dishes or food containers vertically. They make it all visible at a glance.
- Use Wall-mounted Shelves: For items you use often, consider wall shelves. They free up cabinet space and keep essentials at eye level.
- Employ Tension Rods: A tension rod can create new storage rows. Slip in cutting boards or baking sheets. This trick keeps them organized and easily accessible.
- Hang Utensils Under Cabinets: If your wall space is limited, the underside of cabinets is perfect. Put up some hooks and hang often-used utensils.
By maximizing vertical storage, you can keep counters clear. This results in a cleaner and more efficient kitchen. With everything in its place, the chaos of searching for items disappears. Now, stay tuned for our next step on introducing clear containers and labeling to minimize time spent on searching even further.
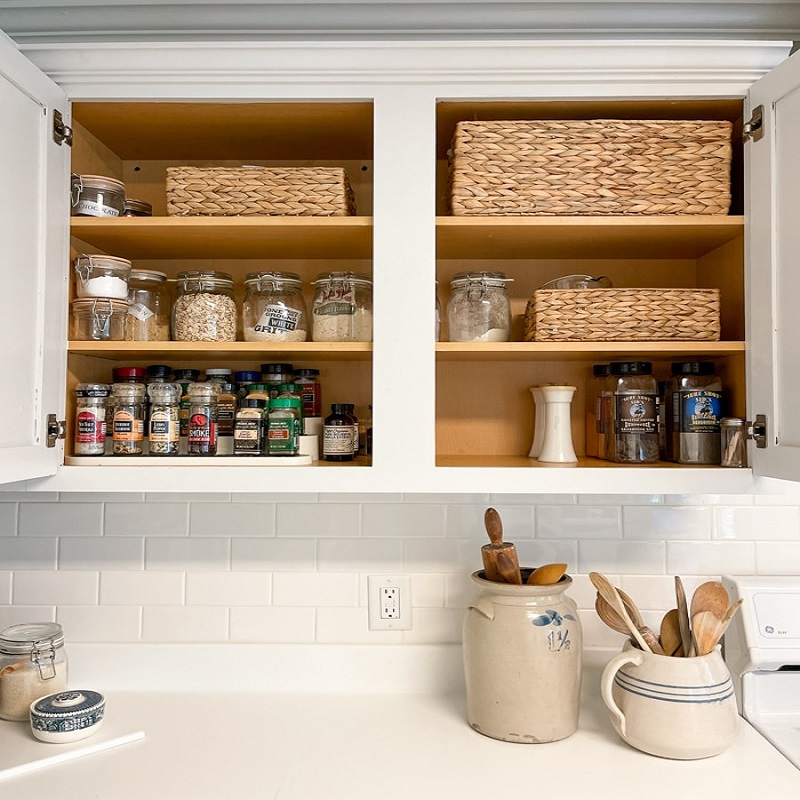
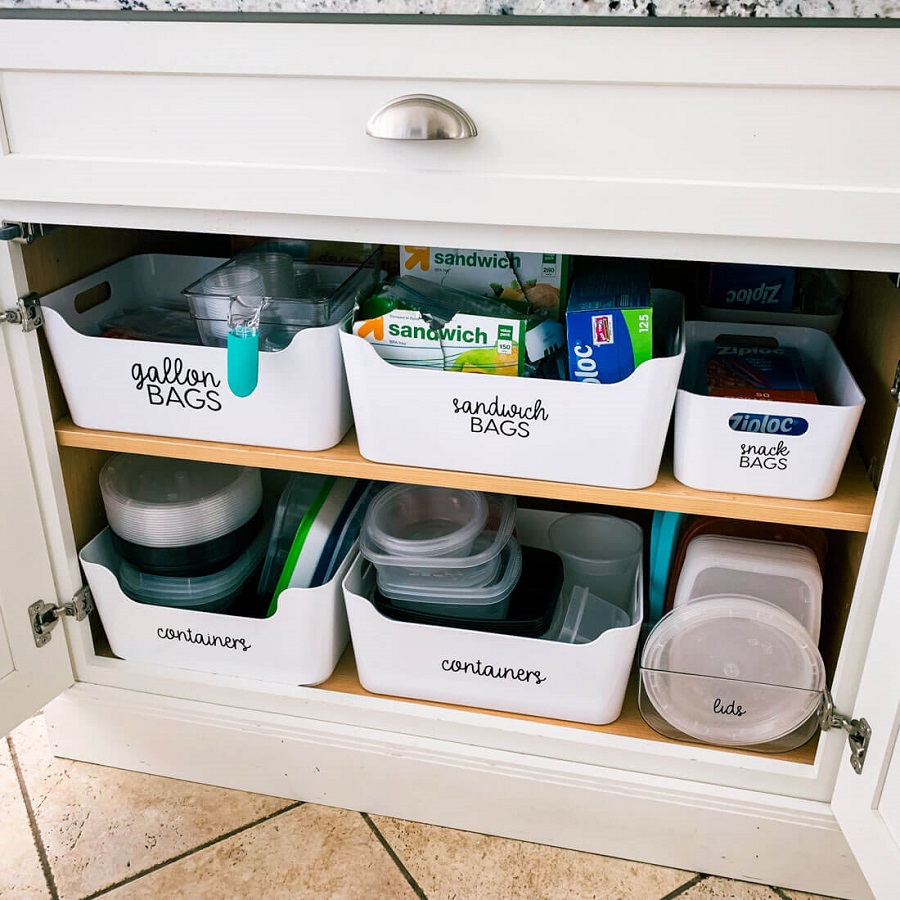
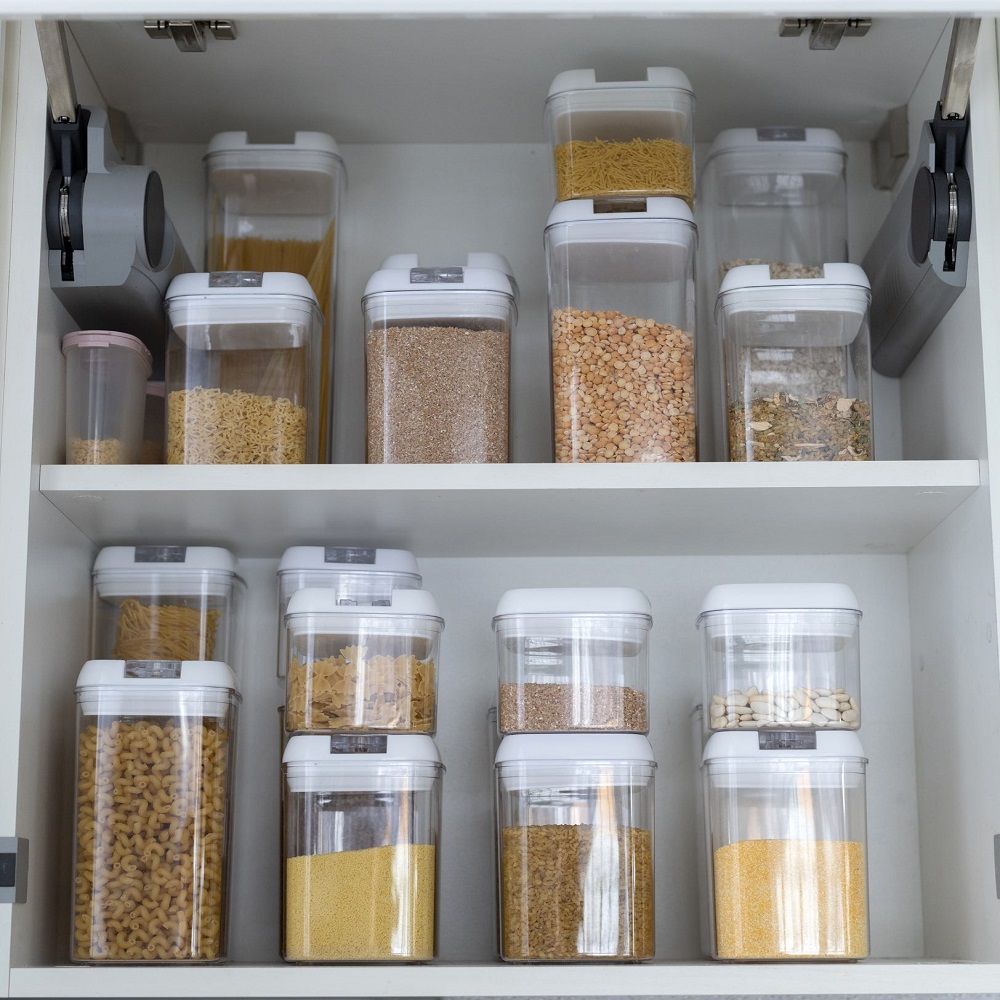
Step 6: Implement Clear Containers and Labeling Systems
In this step, clear containers and labeling take center stage. Here’s what to do:
- Choose Transparent Containers: Pick clear jars and boxes for your dry goods and small items. Seeing inside saves time finding what you need.
- Label Everything: Use labels on each container. Include names and expiration dates if needed. This helps everyone know where things go.
- Match Lids and Containers: Keep your food storage lids and containers together. Stacking them neatly avoids a messy drawer or shelf.
- Sort by Usage: Arrange the labeled containers by how often you use them. Put the ones you use most at the front.
- Consistent Container Sizes: Stick to a few sizes for stacking and easy fit in cabinets. This trick keeps your space neat and organized.
- Update Labels as Needed: When you use up and replace items, update the labels. This keeps your system in check.
With clear, labeled containers, your kitchen is not just organized. It’s functional and intuitive. Next, we’ll talk about how to keep it that way with a regular maintenance routine.
Step 7: Establish a Maintenance Routine
The final step in organizing kitchen cabinets is to maintain your new setup. Here’s how to keep your kitchen orderly:
- Set a Cleaning Schedule: Pick a day each week for a quick cabinet tidy-up. Wipe shelves and return any out-of-place items.
- Check Before Shopping: Glance through your cabinets. This helps avoid buying doubles of things you already have. It also reminds you to use items that are nearing expiration.
- One-In-One-Out Rule: When a new kitchen item comes in, let an old one go. This stops clutter from coming back.
- Seasonal Reassessments: At each season’s start, look through your kitchen. Update and reorganize as cooking habits change.
- Involve the Household: Teach everyone where items belong. More helpers mean less mess.
- Audit Regularly: Stay aware of what’s in your cabinets. It improves your use of space and keeps things fresh.
By keeping up with these simple routines, you ensure your kitchen remains a haven of organization. This wraps up our 7 steps for organizing kitchen cabinets, setting you on a path to more enjoyable cooking and a serene kitchen space.