Before and After: The Transformation Journey
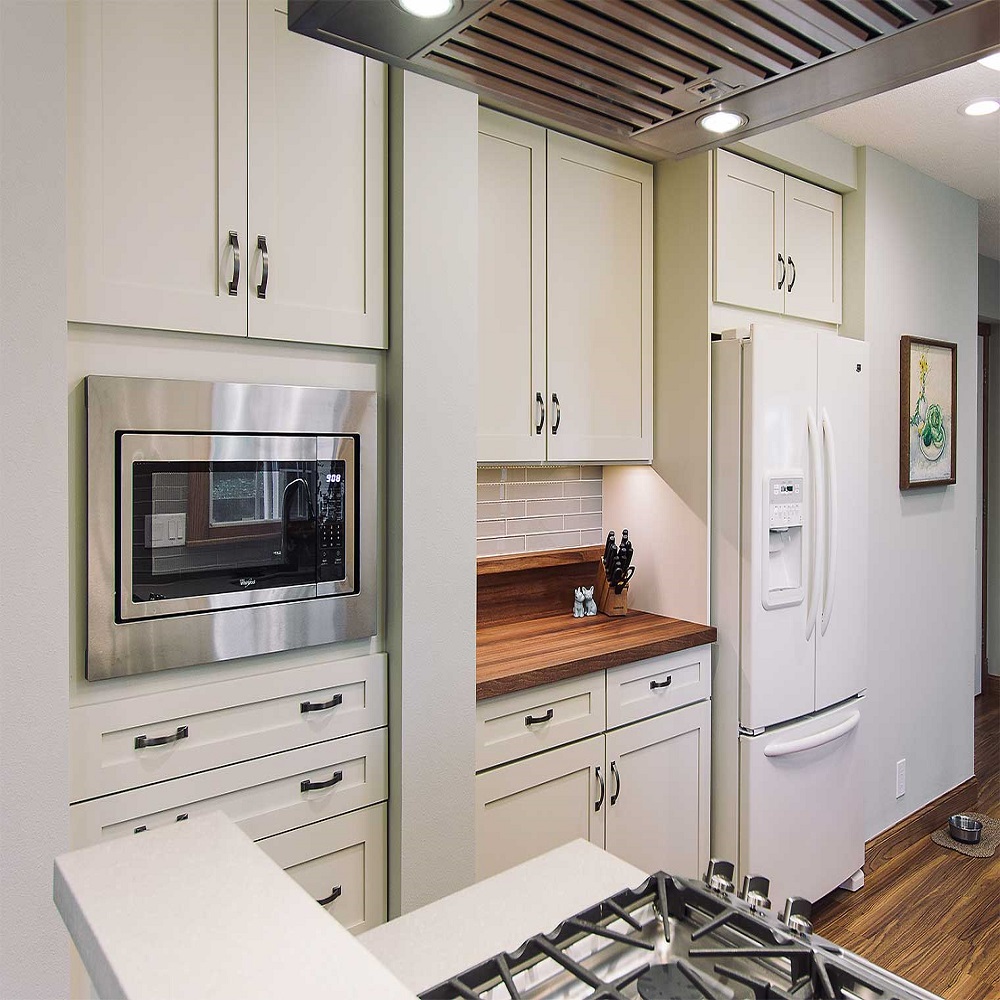
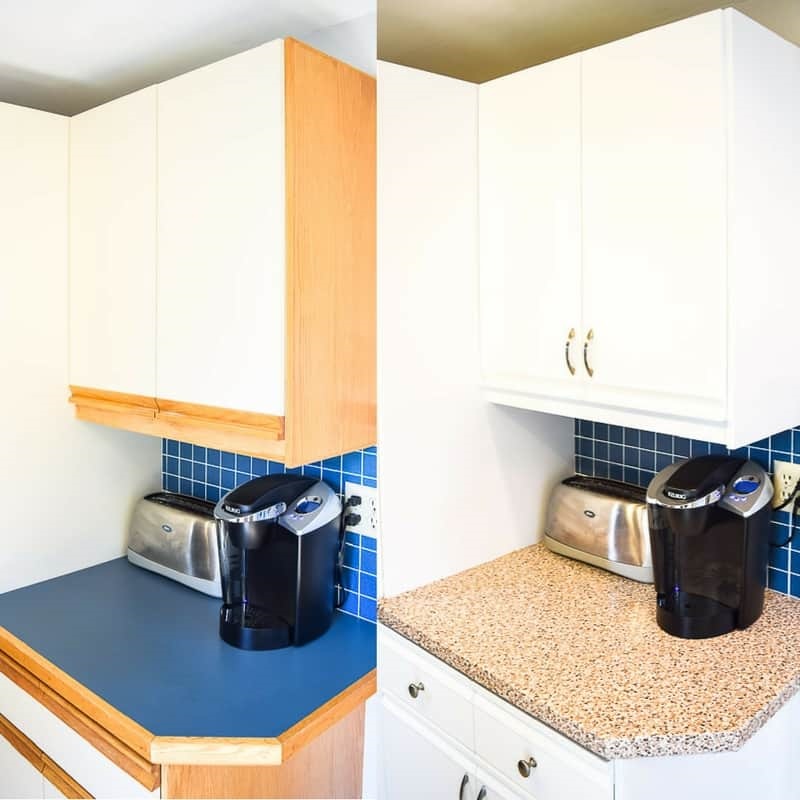
Embarking on a makeover for 80s kitchen cabinets can utterly transform a kitchen’s appearance. From drab and dated to sleek and stylish, the journey often begins with a clear vision. Before the transformation, these kitchens may feature melamine and oak cabinets, with a design that screams outdated. But after the makeover, it’s like a breath of fresh air has swept through the space.
Seeing the before and after photos highlights the dramatic impact of the makeover. Initially, the space may feel closed-off and dreary. The old cabinets and worn countertops tell a story of a bygone era. Yet, once revitalized, the kitchen becomes bright, inviting, and modern. It’s not just about aesthetics; the update brings a newfound pride in one’s home.
The process, however, requires dedication and patience. It’s a journey through picking the right materials, carefully preparing the surfaces, painting in stages, and adding final touches like new hardware. Understandably, each step takes time and effort. One might even take breaks in between, as life and other home projects take precedence. Nevertheless, the end result is worth it.
The transformation journey is a testament to how much homeowners can achieve with some elbow grease and creativity. So, as we delve deeper into the steps of revamping your 80s kitchen cabinets, let’s keep the stunning transformation in mind. It’s not just about changing a kitchen; it’s about changing how you feel in your home.
Key Steps for Preparing Your Cabinets
The first and perhaps most crucial step in your 80s kitchen cabinets makeover journey is preparation. Skipping this stage can result in a less durable finish, so it’s important to get it right. Here are the key steps to prepare your cabinets for a stunning transformation:
- Clean Thoroughly: Dust and grime are common on old cabinetry. Use a degreaser to clean all surfaces meticulously. This ensures that the primer and paint adhere properly.
- Remove Hardware: Take off all handles, knobs, and hinges. It’s a good time to decide if you’ll reuse or replace them.
- Sand Surfaces: Sanding removes the glossy finish and provides a better grip for primer and paint. Use medium-grit sandpaper and sand every surface lightly.
- Repair Damages: Fill any nicks or holes with wood filler. Once it’s dry, sand the area again for a smooth finish.
- Prime with Quality Product: A shellac-based primer is advised, especially for oak cabinets known for tannin bleed. This step will prevent discoloration and ensure a true color for your paint.
- Tape Off Areas: Use painter’s tape to protect walls and other areas from stray brushstrokes.
By following these steps, you can rest assured knowing that the foundation for your 80s kitchen cabinets makeover is set for success. Preparation is key, and a well-prepped cabinet is the main ingredient for an outstanding finish.
Choosing the Right Paint and Primer for Your Cabinets
Selecting the ideal paint and primer can make or break your 80s kitchen cabinets makeover. A smooth and long-lasting finish hinges on using quality products. Here is a straightforward guide to help you choose the right options for your cabinets:
- Opt for High-Quality Primer: A shellac-based primer works best, especially on oak cabinets prone to tannin bleed-through. This will ensure your paint’s true color remains without any discolored patches.
- Choose the Right Paint: Go for a paint designed for cabinetry. These often have hardeners for a durable finish. A semi-gloss or satin finish is usually recommended as it offers some sheen and is easier to clean.
- Invest in the Proper Tools: Use high-quality brushes and rollers. These help to avoid streaks and bristle marks and can make a difference in the paint’s finish.
- Test Samples: Before committing to a color, test it on a small area or piece of cardboard. This helps you see how the color looks in different lights.
- Read Reviews and Seek Advice: Look at reviews for the products you’re considering. Ask for recommendations at your local hardware store.
With the right paint and primer in your toolkit, your outdated 80s kitchen cabinets will be well on their way to a fresh, modern look.
Selecting and Installing New Hardware
When updating your 80s kitchen cabinets, choosing new hardware is a critical step. It’s like adding jewelry to your kitchen. Revitalized cabinets need new knobs and pulls that complement their style. Here are some simple guidelines to help you select and install the right hardware for your makeover:
- Measure Existing Holes: If you plan to use the existing holes in your cabinets, measure them. This helps ensure the new hardware fits perfectly.
- Consider the Style: Pick hardware that matches the new look of your painted cabinets. Sleek, modern handles go well with a contemporary theme.
- Keep Comfort in Mind: Make sure the hardware feels good in your hand. It must be practical for everyday use.
- Tools and Templates: Use a hardware template for accurate drilling. This ensures that all handles and knobs are aligned.
- Positioning: Place the hardware where it’s most comfortable to reach. Test different placements before final installation.
- Get the Right Screws: Sometimes, the screws that come with the hardware are too long or short. Make sure you have screws that fit the thickness of your doors and drawers.
- Do a Trial Run: Attach one handle or knob to start. Check that it’s secure and looks good before proceeding with the rest.
New hardware won’t just improve the look of your cabinets. It will also enhance the functionality and comfort of your kitchen. Take your time when choosing and installing hardware to ensure the best results for your 80s kitchen cabinets makeover.
Tips for Using Contact Paper on Countertops
When rejuvenating your 80s kitchen cabinets, don’t overlook the countertops. Contact paper offers a budget-friendly option for a fresh look. Here are valuable tips for using contact paper during your kitchen cabinet makeover:
- Choose Quality Contact Paper: Select a heavy-duty adhesive film to withstand kitchen use.
- Clean Surfaces: Wipe your counters clean of any grease or debris for smooth application.
- Measure Accurately: Take precise measurements to ensure the contact paper fits with minimal seams.
- Apply Carefully: Start from one end and gradually smooth out bubbles as you go.
- Seam Direction Matters: Align seams in one direction to avoid dirt catching and for seamless look.
- Cut to Fit: For edges and curves, cut smaller pieces for precision and easy replacement.
- Consider a Sealer: Some contact paper may benefit from a sealer to extend its durability.
- Keep Extra on Hand: Buy an additional roll for future repairs or changes.
Implement these tips, and your countertops can complement your 80s kitchen cabinets makeover beautifully without breaking the bank.
Adding Extra Storage: Building a Pantry Cabinet
A well-organized kitchen demands ample storage space. Often, 80s kitchen cabinets lack adequate storage, making it challenging to keep essentials within reach. Building a pantry cabinet can address this and enhance your kitchen’s functionality. Below are steps to guide you in adding extra storage to your kitchen makeover:
- Measure Your Space: Begin by measuring your kitchen to determine the size of your new pantry cabinet.
- Design the Cabinet: Plan the cabinet design. Think about shelf height and door style that suit your needs.
- Choose Material: Select sturdy material that complements your revamped cabinets for a cohesive look.
- Cut and Assemble: Cut the pieces based on your design. Assemble the frame, shelves, and doors.
- Install Hardware: Attach hinges, door handles, or knobs that match your updated kitchen style.
- Secure the Cabinet: Mount your pantry cabinet to the wall. Ensure it’s stable and level.
- Organize Your Items: Stock your pantry with kitchen essentials and use organizers for better space utilization.
Adding a pantry cabinet not only provides extra storage but also contributes to the overall aesthetic of your 80s kitchen cabinets makeover. It’s a practical and stylish way to maximize your kitchen’s potential. Remember to integrate it well with your cabinet style for a seamless and updated look.
Maintaining Your Cabinets Post-Makeover
After you’ve invested time and effort into your 80s kitchen cabinets makeover, keeping them in top condition is crucial. Proper maintenance ensures your cabinets look great for years. Here are easy-to-follow tips for cabinet care post-makeover:
- Regular Cleaning: Wipe down your cabinets often with a soft, damp cloth. Stay away from abrasive cleaners or pads.
- Immediate Spill Response: Clean spills as soon as they occur to prevent stains and damage.
- Avoid Moisture: Ensure your kitchen is well-ventilated. Excessive moisture can harm the paint and wood.
- Use Gentle Products: Choose mild soaps for cleaning. Harsh chemicals can strip the paint off.
- Touch-Ups: Keep leftover paint for quick touch-ups. Address chips or scratches immediately.
- Hinge Care: Lubricate cabinet hinges yearly. This prevents squeaking and wear.
- Protect from Heat: Use cabinet shields to deflect heat from appliances like ovens and dishwashers.
- Line the Shelves: Use shelf liners to protect the cabinet’s interior from scratches and spills.
By following these tips, your makeover efforts won’t go unnoticed. Your kitchen will remain as beautiful as the day you finished revamping your cabinets. Stay proactive with these simple maintenance steps, and enjoy your refreshed kitchen space for many years.
Other DIY Kitchen Remodel Projects to Consider
Beyond a successful 80s kitchen cabinets makeover, there are other projects to transform your kitchen. Each enhances your kitchen’s design and functionality. Here are a few ideas:
- Updating Backsplash: Swap out dated tiles for modern designs. This refreshes your kitchen’s entire look.
- Replacing Faucets: Install a new kitchen faucet. Choose one for its utility and style.
- Installing Under-Cabinet Lighting: Add lighting under cabinets. It improves visibility and ambiance.
- Painting Walls: A fresh coat of paint can change your kitchen’s mood. Pick colors that complement your cabinets.
- Upgrading Appliances: If budget allows, new appliances can be energy-efficient and stylish.
- Flooring Changes: Replace old flooring with new, durable options. It enhances the kitchen’s feel.
- Organizing Accessories: Use drawer dividers and shelf organizers. They keep your items tidy.
- Window Treatments: Update your kitchen windows. New blinds or curtains improve light control and privacy.
- Creating a Coffee Bar: Dedicate a space for coffee making. It’s a trendy and functional addition.
- Adding an Island: If space allows, an island adds counter and storage space.
Consider these projects to further update and personalize your kitchen. Each adds unique value to the heart of your home. Remember, small changes can make a big impact.