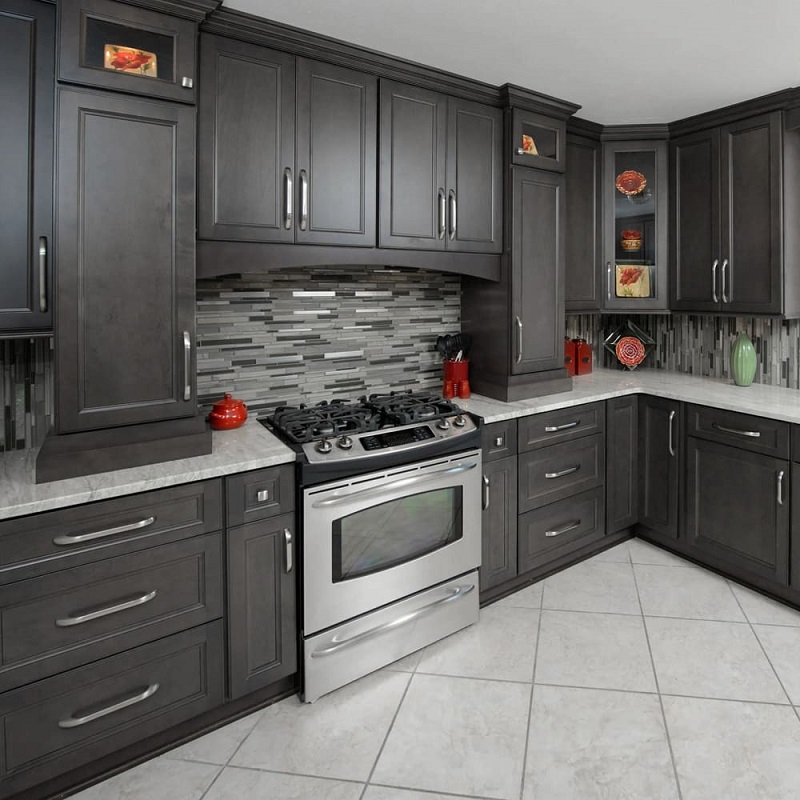
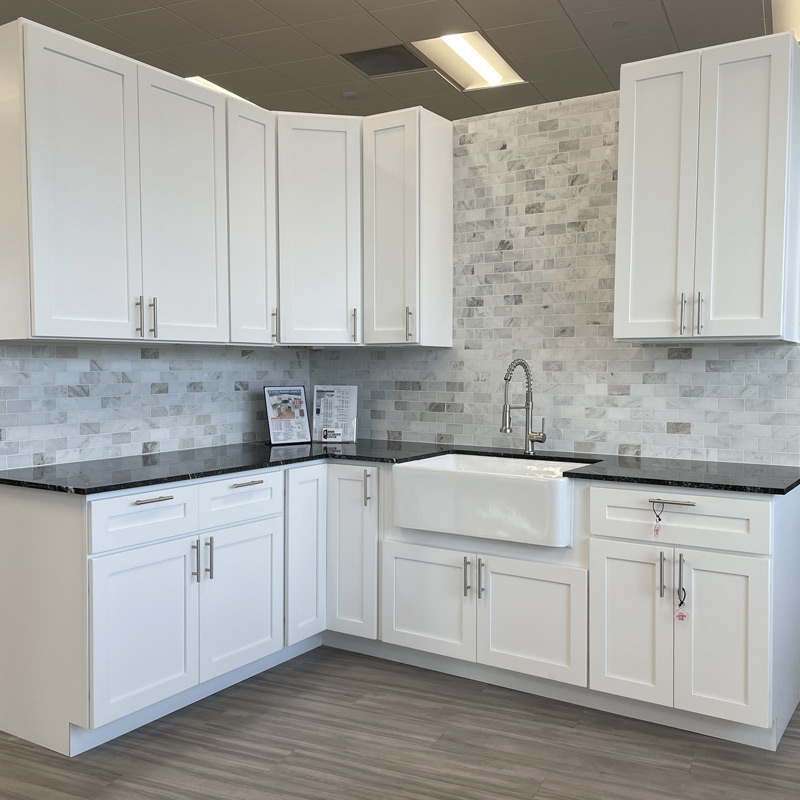
Hanging cabinets is a rewarding task that can dramatically enhance the functionality and appearance of a space. Whether you’re updating your kitchen or installing cabinetry in another room, achieving a professional-level installation requires careful planning, the right tools, and precise execution. This comprehensive guide will delve into each step necessary for hanging cabinets like a professional, ensuring that your project results in a flawless finish.
Understanding the Basics of Cabinet Installation
The Importance of Proper Planning
Before diving into the physical work of hanging cabinets, it’s crucial to invest time in thorough planning. Accurate measurements and a well-thought-out layout plan will set the foundation for a successful installation. Start by measuring the entire wall space where the cabinets will be placed. Consider the height, width, and depth of the cabinets, as well as any potential obstacles such as electrical outlets, windows, or existing fixtures. Sketch out a detailed layout, marking the exact positions of each cabinet. This plan should also include allowances for trim or molding, ensuring that your design is both functional and aesthetically pleasing.
Planning involves more than just measurements; it also includes choosing the right type of cabinets and understanding their mounting requirements. Decide whether you want stock, semi-custom, or custom cabinets, and make sure to account for their weight and mounting needs in your planning. Additionally, consider the overall design and flow of the room to ensure that the cabinets complement other elements such as countertops and appliances.‘ ’
’
Tools and Materials Needed
Having the appropriate tools and materials is essential for a smooth and professional cabinet installation. The primary tools you will need include a stud finder, level, tape measure, drill, screwdriver, and cabinet mounting brackets. These tools will help you locate studs, ensure cabinets are level, and secure the cabinets properly. Additionally, you will need screws, wall anchors, and cabinet shims. The screws should be long enough to penetrate into the studs, while wall anchors are useful if you need to attach cabinets to drywall without hitting studs. Cabinet shims help to level the cabinets and compensate for any wall imperfections.
In addition to these basic tools, consider having a saw, a hammer, and a caulking gun on hand. A saw is useful for any adjustments you may need to make to the cabinet dimensions or trim pieces. A hammer can be used for installing trim or molding, while a caulking gun is essential for sealing gaps and finishing touches. Ensure that all your materials and tools are organized and ready before beginning the installation process to avoid unnecessary delays.
Preparing the Wall for Installation
Finding and Marking Studs
One of the most critical steps in hanging cabinets is locating the wall studs. Studs provide the necessary support for heavy cabinets, so it’s essential to attach the cabinet to them rather than relying solely on drywall anchors. Use a stud finder to locate the studs behind the wall, and mark their positions with a pencil. If a stud finder is unavailable, you can use the manual method of tapping the wall and listening for changes in sound to identify the studs. Mark the stud locations clearly on the wall, and ensure they are aligned with your cabinet layout plan.
Once you have located and marked the studs, you should double-check their positions with a tape measure to ensure they align with your planned cabinet placements. It’s also a good idea to use a level to confirm that the marks are perfectly horizontal. Accurate stud marking is crucial for ensuring that the cabinets are securely mounted and remain stable over time.
Leveling and Measuring
Accurate leveling and measuring are key to a professional-looking cabinet installation. Begin by marking a horizontal line on the wall where the bottom of the upper cabinets will be placed. This line should be level and aligned with the height of the cabinets, ensuring that they will be installed at the correct height. Use a level to draw this line, and check it multiple times to ensure accuracy.
Measure from this line to the top of the cabinets to confirm the proper height. Additionally, check for any variations in wall height or uneven surfaces that might affect the installation. If the wall is uneven, use shims to compensate for these variations and ensure that the cabinets will be level once mounted. Accurate leveling and measuring will help prevent gaps, misalignment, and other issues that can arise during installation.
Installing the Upper Cabinets
Mounting the Cabinets
With the wall properly prepared, it’s time to start mounting the upper cabinets. Position the first cabinet on the wall, aligning it with the studs and the level line you previously marked. Ensure that the cabinet is correctly aligned with your layout plan and that it fits snugly against the wall. Use a drill to insert screws into the studs, securing the cabinet in place. It’s important to drive the screws straight into the studs for maximum support and stability.
If you’re installing multiple upper cabinets, it’s helpful to use cabinet mounting brackets or a cabinet hanging system. These tools can assist in holding the cabinet in place while you secure them to the wall. Ensure that each cabinet is level before tightening the screws completely. Use shims to make any necessary adjustments and ensure that the cabinet is perfectly aligned with the level line.

Adjusting and Securing
After mounting the upper cabinets, check for any gaps or unevenness. Use shims to adjust the cabinet positioning as needed, ensuring that it is perfectly level and flush with the wall. Tighten all screws and brackets securely to ensure that the cabinet is firmly attached. If the cabinet doors or hardware are misaligned, make adjustments to align them properly. This step is crucial for ensuring that the cabinets function correctly and have a professional appearance.
Installing the Lower Cabinets
Positioning and Leveling
Once the upper cabinets are securely mounted, focus on installing the lower cabinets. Begin by positioning the lower cabinets on the floor, ensuring they align with the layout plan and level lines you created earlier. Use a level to check the cabinet positioning and adjust the height as needed using cabinet shims. Proper leveling is essential to ensure that the lower cabinets are aligned with the upper cabinets and create a cohesive look.
Measure the distance between the lower and upper cabinet to ensure that they are properly aligned and spaced. This step is crucial for achieving a balanced and visually appealing installation. Make any necessary adjustments to the height or position of the lower cabinets before securing them to the wall.
Securing the Cabinets
With the lower cabinet properly positioned and leveled, it’s time to secure them to the wall. Use a drill to drive screws into the wall studs, just as you did with the upper cabinets. Attach cabinet mounting brackets for additional support if needed. Ensure that each cabinet is level and aligned with the upper cabinets before tightening all screws and brackets. This will ensure a stable and secure installation.
Adding Finishing Touches
Installing Cabinet Hardware
Once the cabinets securely mount, focus on installing cabinet hardware. This includes handles, knobs, and hinges. Use a template or carefully measure the positions for the hardware to ensure consistency and proper alignment. Install the hardware using the appropriate screws and tools, and check that all handles and knobs are secure and functional.
Ensure that the hardware complements the overall design of the cabinets and the room. Choose hardware that matches the style and finish of the cabinets to achieve a cohesive look. Test the functionality of all hardware components to ensure they operate smoothly and are properly aligned.
Adding Trim and Molding
To give your cabinets a polished and professional appearance, consider adding trim or molding. Measure and cut trim pieces to fit around the cabinet, using a miter saw for accurate cuts. Attach the trim using finishing nails or adhesive, and fill any gaps or nail holes with wood filler. Sand and paint or stain the trim as desired to match the cabinets and complete the installation.
Troubleshooting Common Issues
Addressing Misalignment and Gaps
During the installation process, you may encounter issues such as misaligned cabinet or gaps. If you notice that the cabinets are not perfectly aligned, use shims to make adjustments and ensure that they are level. For gaps between cabinet or between the cabinets and the wall, fill these with caulk or wood filler for a seamless finish.
Inspect the installation carefully from different angles to identify any issues that need to address. Make necessary adjustments and touch up any areas to ensure a professional-quality result.
Dealing with Uneven Walls
In older homes or on uneven walls, you might face challenges when installing cabinet. Use a level to check for any deviations and adjust the cabinet positioning as needed. Cabinet shims can help compensate for uneven surfaces and ensure that the cabinets are securely and evenly mounted.